15 Standing Yoga Poses That Will Build Full-Body Strength & Balance
Our hectic daily lives leave us tired and exhausted as a result of poor posture and alignment. As we age, we develop various physical ailments such as back pain, muscular cramps, spinal issues, and so on. Yoga alleviates such physical conditions by relaxing the joints and muscles of your body.
There are numerous reasons to incorporate yoga into your daily routine, including improved flexibility, faster metabolism, better sleep, and balanced mental health. Not to mention that yoga can be done almost anywhere. This is especially true for the standing yoga poses which can be done without a yoga mat and equipment.
In this article, we will tell you about various standing yoga poses that you can practise at home or outdoors. These postures are very easy to do. You can learn these on your own or under an expert yoga practitioner.
Benefits of Standing Yoga Practice
Standing poses help in keeping you ‘grounded’, connect you deeply to the ground and teach consistency in life. Here are a few advantages of standing yoga poses:
- By energizing and strengthening the entire body, standing postures can improve circulation and stamina.
- Standing postures are a complete and focused practice that includes twisting, bending (backward, forward and side) and stabilising.
- Stretches full body without any equipment.
- Corrects spinal imbalances.
- Relaxes the nervous system.
- Reduces anxiety and stress.
- Improves self-esteem.
- Strengthen the body’s core muscles.
- Improves the balance and alignment of the body.
- Calf and knee muscles get strengthened.
- Stretching helps the body fight against obesity.
Preparing for the Standing Yoga Postures
Even though standing yoga poses may seem like they don’t require any warm-up, it’s a good idea to prepare your body for the bends and stretches. Below are some warm-up postures to make your standing yoga more effective –
- Arm Circles – This is a very simple stretching exercise that warms you up and improves the blood circulation in the body. It also helps in toning the upper body.
- Stretch your arms out and rotate in the clockwise and anticlockwise direction.
- Standing Backbend – With this pose, you can easily release the tension in your lower back.
- Stand tall and with a deep breath bend backwards mindfully, without losing your balance.
- Standing Forward Fold – This pose stretches the lower back, abs, quads, shin and calves, as well as hamstrings and hip muscles.
- Stand tall and with a deep breath stretch your arms up to the sky.
- Now7 with a deep exhale bend forward and bring your arms to your toes or as far as you can stretch.
- Standing Side Bend – This bend stretches the obliques and spine while also improving the posture.
- Stand tall and rest your hands on your waist.
- Look straight and bend sideward and stay on one side for a few seconds.
- Do this on the other side too and repeat a few times.
- Fingers Interlaced Behind the Back Chest Opener – This bend stretches the shoulders, arms and neck.
- Stand tall with your feet shoulder-width apart.
- Take your arms behind your back and interlace the fingers in a lock.
- Now slowly bend forward to form a figure on number seven and raise the arms over the head.
- Stay there for a few seconds before releasing this posture.
- Wide-Legged Forward Bend Twist – This stretch lengthens the spine and opens the shoulders and hips
- Stand tall with your feet shoulder-width apart.
- Place your right hand across the left side of your stomach.
- Place your right arm on the left side across your back.
- Now twist your torso gently towards the left and look behind.
- Stay for a few seconds and repeat on the other side.
15 Standing Yoga Poses That Will Build Full-Body Strength & Balance
Standing yoga poses can help you improve body orientation, homeostasis, and muscular involvement. Below are 15 standing yoga poses that you can do at home on your own or with a yoga teacher.
- Tadasana – Mountain Pose
- Stand up tall with your feet joining and allow your shoulders to relax and drop back.
- Feel your crown stretching toward the sky, grounding you to the mat or the floor.
- Look straight. Together, take a deep breath in and raise your arms to reach up to the sky. Hold for a couple of breaths.
- Uttanasana – Forward Fold
- Stand up tall and look straight.
- Inhale deep with your arms reaching up to the sky.
- As you exhale, bend down from your hips and fold your upper body forward. Slightly bend your knees if you can’t keep your knees straight.
- Inhale and come up into a half-lift with head looking forward. Then exhale and lower back down. Drop your neck and hold for a couple of breaths.
- Utkatasana – Chair Pose
- From Mountain Pose, gently bend your knees to 90 degrees with control over your ankles and hips mimicking sitting on a chair.
- Keep your weight equally distributed on your feet.
- Control your breath, engage your lower abdominal muscles as you reach your arms up and pull your shoulders back for correct alignment.
- Vrikshasana – Tree Pose
- Stand tall. Now, stand on one leg and raise the other leg, bend the knee, and place the bottom of your foot on the inside of the thigh firmly.
- Try to balance the weight of the upper body. Adjust your alignment. Your torso should be forward-facing and not twisting.
- Once you feel you have gained the balance, raise your arms for the namaskar position either over the head or on the chest.
- With controlled breathing, fix your gaze at a distance at a point.
- Balance your weight on a single leg for a couple of minutes and then switch to the other leg using the same instructions.
- Virabhadrasana I – Warrior Pose I
- Stand tall with legs spread apart and arms fully outstretched at shoulder length. Palms facing down.
- Rotate the right foot outwards, turn your torso to the right, look in the same direction and gently bend your right knee.
- Raise your arms, shoulder-width apart, towards the sky.
- The left knee is kept straight and the position is held for one minute with normal inhalation.
- Virabhadrasana II – Warrior Pose II
- Stand tall with legs spread apart and arms fully outstretched at shoulder length. Palms facing down.
- Rotate the right foot outwards. Look towards the right direction but don’t turn your torso in any direction and keep it in the front. Look in the same direction and gently bend your right knee.
- Raise your arms, shoulder-width apart, towards the sky.
- Bring your arms down and outstretch them again at shoulder length.
- Keep the left knee is kept straight and hold the posture for one minute with normal inhalation.
- Virabhadrasana III – Warrior Pose III
- Stand tall with legs spread apart and arms fully outstretched at shoulder length. Palms facing down.
- Rotate the right foot outwards and firmly ground it.
- Gently raise the back feet off the ground and slowly start bending forward. You can either swing your arms behind you or keep them outstretched till you find your balance.
- Raise your back leg, creating a straight line from neck to toe. Hold for a couple of breaths.
- Viparita Virabhadrasana – Peaceful Warrior
- Stand tall with legs spread apart and arms fully outstretched at shoulder length. Palms facing down.
- Rotate the right foot outwards and firmly ground it.
- Turn your head and torso to the right.
- Bring the left hand down behind you, and allow it to rest on the back of the left thigh. Keep the right arm raised.
- Keeping the right biceps by your ear, reach your arm backwards. Gently bend your spine, gazing toward your fingertips.
- Hold for a couple of breaths.
- Utthita Trikonasana – Triangle Pose
- Stand tall with legs spread apart and arms fully outstretched at shoulder length. Palms facing down.
- Rotate the right foot outwards and firmly ground it.
- Straighten the front foot.
- Bring your arms into a “T” position.
- Shift your body forward and bring your right hand to rest on your right shin, ankle or foot, wherever you can reach.
- Lift your left arm toward the sky. Look at the fingertips of the left arm. Hold for a couple of breaths.
- Triangle Twist – Parivrtta Trikonasana
- Stand tall with legs spread apart, arms fully outstretched at shoulder length with palms facing down and forming a triangle.
- Bend sideward on the left-hand side from your waist and bring your left arm down to the right leg ankle or on the mat near your foot.
- Twist your torso and open up your right side.
- Open your shoulders, gently raise your right arm to the sky, turn your head toward the right arm and gaze up at your fingertips. Hold for a few breaths.
- Switch sides and repeat a couple of times.
- Yogi Squat – Malasana
- To prepare for the Yogi Squat, form a standing position. Spread your legs hip-width apart.
- Join your hands in Namaste hand posture.
- Pivot your toes out.
- Gently bend your knees and start going lower to sit in a deep squat.
- You can adjust the distance between your feet as per your comfort and without putting any pressure on the ankles.
- Find your balance.
- Hold for a couple of breaths.
- To come out of the posture, lift yourself from the hips and lower back, without putting your body weight on the knees.
- Ashta Chandrasana – Crescent Lunge
- Stand tall with legs spread apart.
- Rotate both the feet towards the direction and firmly ground it.
- Bend forward and bring your right foot in between your hands and your left leg extended backwards. The left knee will not bend.
- Slowly bend your right knee into a high lunge position, bringing your arms overhead and fixing your gaze in the front.
- Ground your front foot firmly and lift your heel. The left leg will be balanced on the toes.
- Hold for a couple of deep breaths.
- Eka Pada Utkatasana – Figure-4 Chair Pose
- Get into a standing position on the floor or your mat.
- Firmly place your left leg on the ground and carefully lift your right foot. Rest your ankle on the left thigh.
- Without losing your balance, flex your foot, gently hinge at your hips, and lower into a chair pose.
- Hold for a few seconds. Repeat on the opposite side.
- Garudasana – Eagle Pose
- Stand up tall with your feet joining and allow your shoulders to relax and drop back.
- Feel your crown stretching toward the sky, grounding you to the mat or the floor.
- Look straight. Together, take a deep breath in and raise your arms to reach up to the sky.
- Gently bend both the knees
- Firmly ground your right foot. Raise your left foot and slightly cover the left thigh over the right like you are crossing over the left leg.
- Wrap the left foot like a climber and hold it there.
- Find your balance and wrap one arm over the other by crossing the elbow of one over the other.
- Raise it to your face height and hold.
- Take five deep breaths. Repeat it with another side.
- Half Moon Pose – Ardha Chandrasana
- Stand tall with your feet shoulder-width apart.
- Stretch your hands out at shoulder level.
- Bend sideward and start brining your right arm towards the floor but few inches away from the feet. Raise your left arm to the sky.
- Start lifting your left leg off the ground gently.
- Place your right hand on the floor and fix your gaze on the fingertips of the left arm. Support yourself firmly as you find your balance.
- Your left leg should be parallel to the floor and point your toes outwards. Try not to bend the knees of the right leg.
- Raise your arms up to the shoulder level, parallel to the floor.
- Hold for five breaths on each side.
How to Improve Stability and Balance in Standing Yoga Poses?
For leg stability and balance, a technique called “Pada Bandha” is applied. Pada Bandha is a Sanskrit term which can be translated as “Foot Lock.” Pada means “foot” and “bandha” means “to lock”, “seal” or “closure.”
Pada Bandha is a yoga technique that involves placing the soles of the feet on the ground in such a way that the weight is evenly distributed between the ankle, big toe and the little toe. Through the feet, this bandha establishes a connection between the yogi’s body and the earth.
How to Correctly Apply Pada Bandha or Foot Lock?
- To begin, pay close attention to the bottom of your foot. Observe its curvatures, as well as its raised and arched areas. Thank them for all they do—these are the feet that support you every day!
- Locate the four corners of your foot’s sole—the mounds of your big and pinky toes, alongwith the area of the inner and outer heel. In a standing position, place your foot on an even surface (floor or mat) and evenly press each of the four corners down.
- Lift all the five toes together and spread them as far away from your each other and apart as possible.
- Keeping all of the engagement you found in Step 4, place your toes back down—one at a time if you can—still spread widely, almost as if you had webbed feet, or spacers in between your toes (this is what we like to call “yogi toes!”).
- Do the same with your other foot.
Tips for Standing Yoga Postures
It’s best to begin your practice of standing yoga postures under the guidance of a qualified yoga instructor to teach you and build the consciousness of the correct body alignment in the postures.
- To avoid injury or strain, maintain proper ankle, foot and knee alignment and distance.
- If needed, use a wall or a chair for support, especially in balancing poses that require you to balance on a single leg.
- To keep your balance, use a focal point or Drishti to fix your gaze.
- Maintain a slow, deep breath while holding these poses, particularly the more difficult ones.
- If you have tight hamstrings, you can slightly bend your knees or use a yoga strap or yoga blocks to modify them.
- Keep breathing through the stretches for more impact.
Bottomline
Standing yoga postures require both flexibility and strength. They are an important part of a well-rounded Hatha Yoga practice. Standing poses are usually held for shorter periods of time as compared to other poses. The postures are typically held for 2-4 breaths and are more energising and opening. Yoga beginners should concentrate on the basic standing poses to develop a deep understanding of body alignment and muscular engagement.
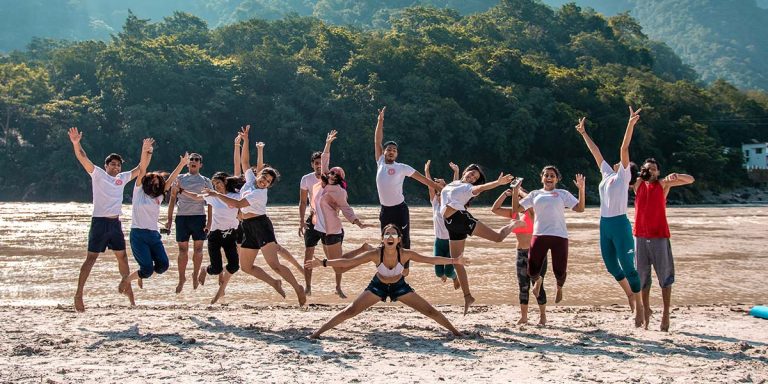
Come and join the yoga teacher training course in Rishikesh at Agni Yoga India and experience the magic of yoga. Whether you are a beginner or want to advance your yoga journey, you can become a world-class Certified Yoga Teacher at our yoga school.
Related Posts:
- Yoga Poses for Weight Loss: The Top 10 Advantages
- Yoga for Diabetes. How Stress Causes Diabetes.
- 5 Yoga Poses that give you relief from back pain
- 10 Benefits of daily yoga practice
- Why choose yoga as a career?
- Yoga Teacher Training vs Yoga Retreat. What should you choose?
- Methods to boost Endurance during Aerobic and Anaerobic Exercises.
- Yoga Teacher Training in Rishikesh India
- Why Join Agni Yoga India for Yoga Teacher Training in Rishikesh India?
- 500 Hour Yoga TTC in Rishikesh
- How to Dress Correctly for a Great Yoga Session? A Beginners Yoga Outfit Guide